
There are two ways to create an account in Kapta: manual setup, and, if enabled, import from an external CRM such as Salesforce. This article focuses on creating accounts manually from within Kapta. But for imported accounts, we still recommend that you read through all articles in this section, since it’s likely you’ll have to clean up data, make corrections and adjustments, and enter some data manually.
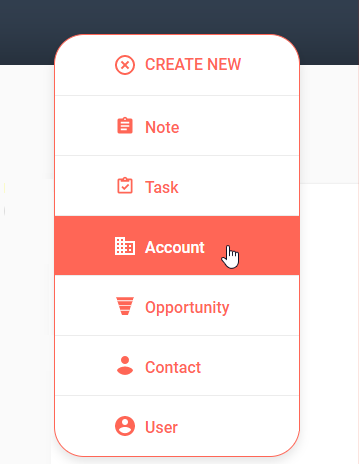
From anywhere within Kapta, click the CREATE NEW button at the top right, and choose Account.
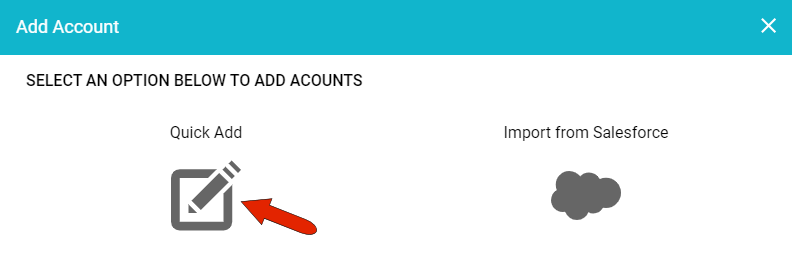
If import from Salesforce, Hubspot, or another CRM is enabled, that option will appear in the Add Account window. For manual account setup, click Quick Add.
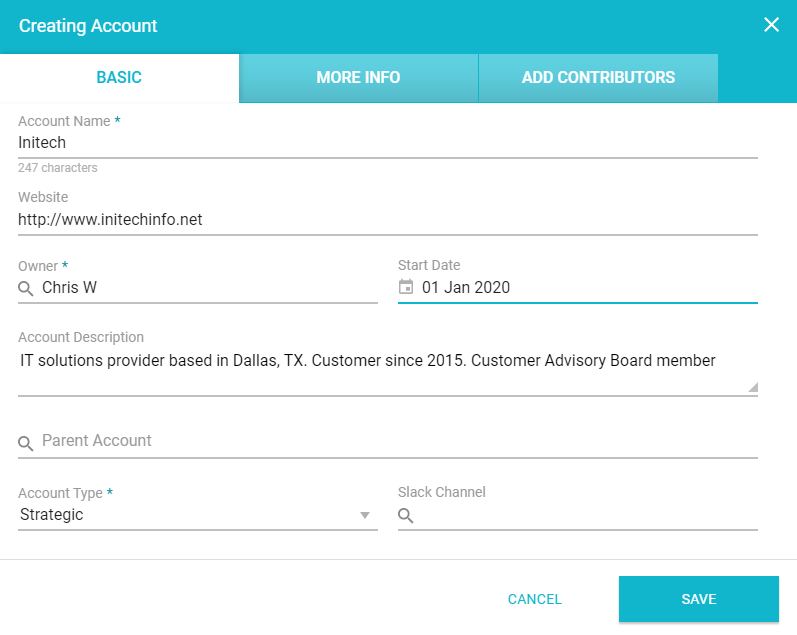
On the BASIC tab, the mandatory fields are Account Name, Owner (account manager), and Account Type. By default, the Owner field is filled in with your name, but you can remove your name and find the correct user. Users are set up by the administrator.
There are four account types. When creating a new account, you’ll be choosing between Normal, which means normal account rules and requirements, and Strategic, for accounts that have special rules or requirements. Your company can make the determination as to what would make an account strategic.
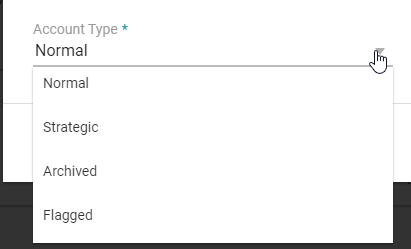
Archived and Flagged are options used when editing an existing account.
We recommend filling in as many as possible of the other fields on the BASIC tab, such as website, description, and parent account if applicable. A full set of company profile details is an important component of account's health score.
You can also link a Slack channel, or another CRM, to the account. Configuring Kapta to work with external applications is also set up by the administrator.
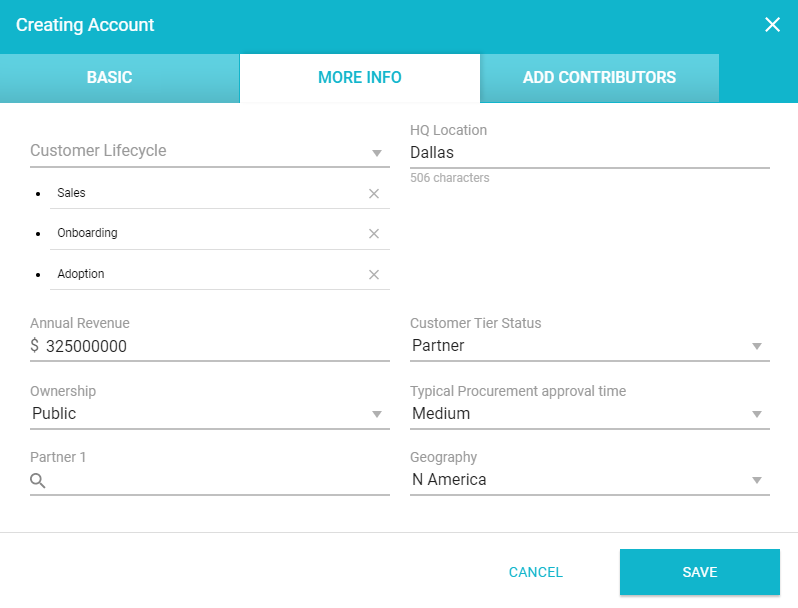
The MORE INFO tab contains custom fields related to the customer; these fields are set up by the administrator. For account setup, these fields can include customer location, annual revenue, ownership, and the like.
Note: When importing from Hubspot, the admin can also set up custom fields to match Hubspot fields.
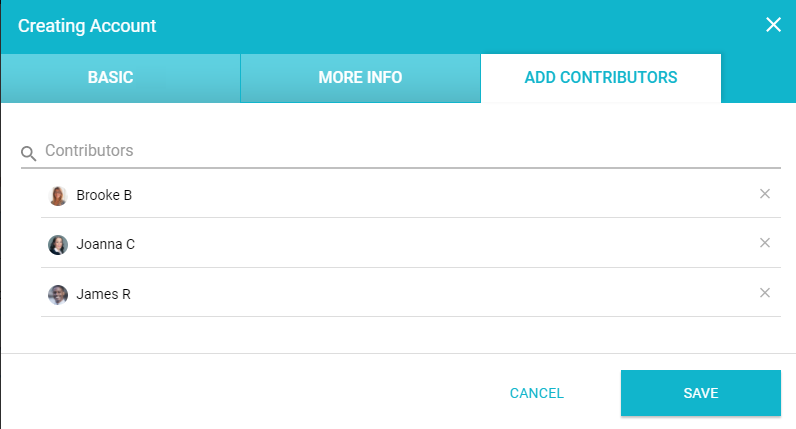
The third tab, ADD CONTRIBUTORS, is where you can list team members, other than the account manager, who also work on this account.
After clicking SAVE, the account will be open in the Accounts menu, ready to have more details filled in.
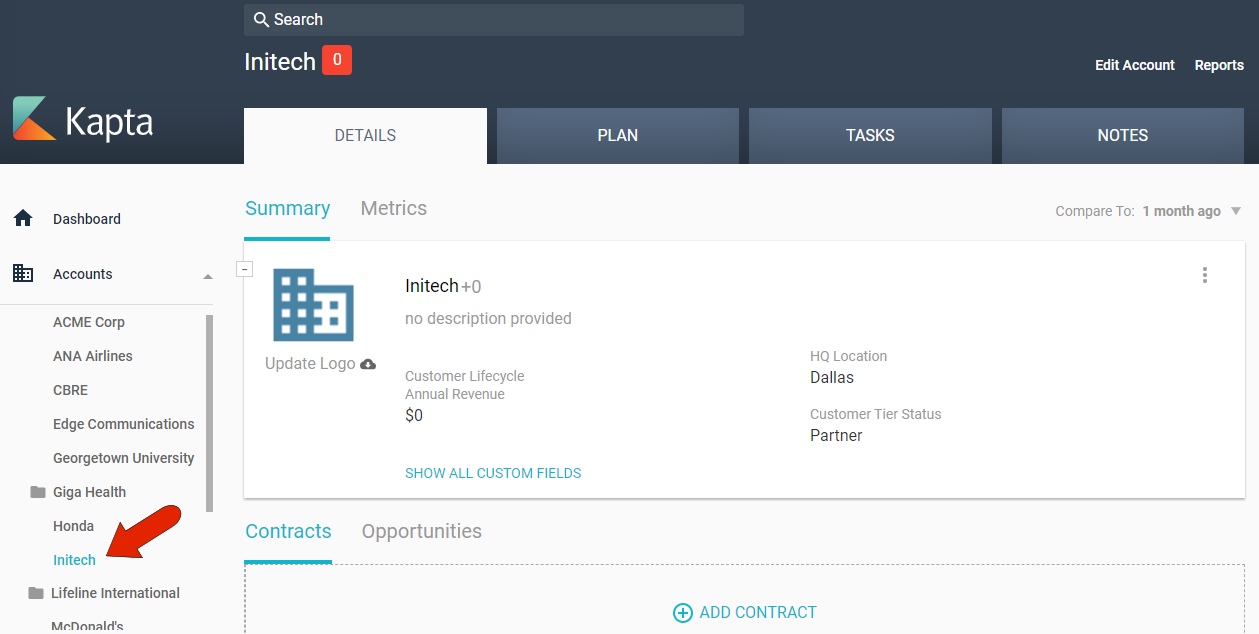
You can click the logo placeholder in the SUMMARY tab to upload a logo image, or let Kapta's AI search find the logo from the company website.
To edit or delete an account, click the three-dot icon at the top right of the account's Summary section of the DETAILS tab.
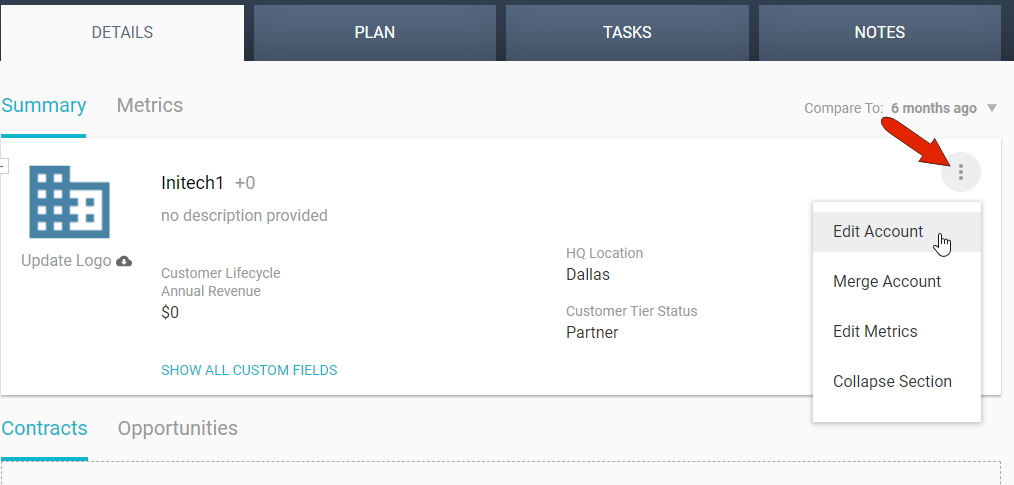
When editing, use the Remove Account option with caution - deleting an account cannot be undone. In general, a better option is to change the Account Type to Archived.
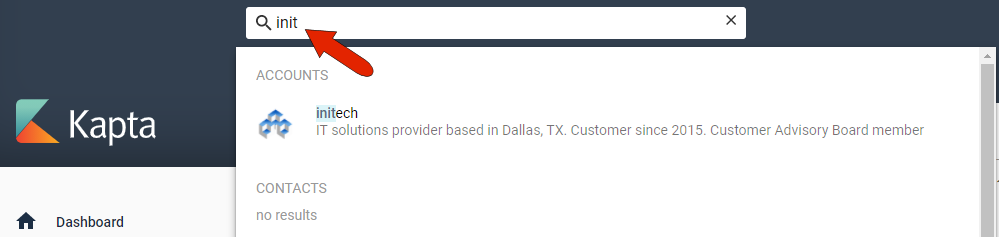
You’ll also be able to access this account by searching for it in the always-available search field at the top.
Comments
0 comments
Article is closed for comments.